In modern construction projects, excavators are often equipped with various attachments to handle different tasks such as earthmoving, crushing, trench digging, and material handling. Proper use and maintenance of these attachments not only prolongs their lifespan and reduces downtime, but also improves construction efficiency and ensures safety. This article focuses on typical attachments, including hydraulic breakers, buckets, and hydraulic booms, discussing three aspects: "Precautions for Use + Maintenance Tips + Common Faults and Prevention".
1. Precautions for Use
1.1 Matching Principles
The hydraulic breaker should be matched to the excavator's weight, hydraulic flow rate, and pressure. An oversized or undersized breaker will affect efficiency or cause damage.
Do not overload the hydraulic breaker, and avoid using it for lifting or moving heavy objects (i.e., do not use it as a lever or crane).
1.2 Maintain Vertical Impact
The hydraulic breaker should always be kept approximately vertical to the impact surface. Avoid angled impacts to prevent bending, uneven loading, or excessive wear on the tool shaft, seals, housing, and connecting rods.
Avoid "dry striking" or "air striking" (activating the breaker without the tool tip contacting an object). Air striking sends the impact energy back into the breaker, causing internal damage, fatigue, and seal damage.
Continuous long-term impact at the same point is not recommended. Generally, the impact time at one point should not exceed 10-15 seconds (or follow the manufacturer's recommendations); if the material is not broken, slightly move the position and continue.
1.3 Proper Downforce and Operation
Apply sufficient downforce to the hydraulic breaker to ensure the tool tip remains in contact with the object; avoid allowing the breaker to "float" during operation.
Do not use the hydraulic breaker to lift the excavator or push heavy objects.
When working in confined spaces or trenches, avoid the breaker hitting the boom, support frame, or other structural components. Operators should anticipate the movement path to prevent interference or collisions.
During installation, removal, or movement, avoid leaving the tool tilted or upside down for extended periods to prevent abnormal weight loads on the seals, seal damage, or oil leakage.
1.4 Environment and Work Surface Selection
Choose a firm and level surface to support the excavator, avoiding unstable conditions caused by sloping terrain.
For work surfaces with high strength, such as concrete or rock, start by breaking up the material along the edges and gradually move towards the center. Avoid directly impacting the center of hard surfaces, as large pieces of material may be difficult to break and could cause excessive stress.
1.5 Safety Precautions
Operators must wear protective equipment such as safety glasses, hearing protection, and a helmet. Ensure the cab and observation area have protective shields, curtains, and debris shields.
Keep the area around the machine clear of people and obstacles. Be aware of potential hazards such as flying debris, vibration, and recoil.
Never leave the machine during operation, reach towards the tool, or improperly release pressure.
2. Maintenance Tips
2.1 Lubrication and Grease
The interior of the hydraulic breaker and the tool interface must be lubricated regularly. Common practice is to apply specialized chisel paste (breaker head lubricant/grease) every 1-2 hours of operation, or after a certain number of impacts, to reduce friction, cool the components, remove debris, and protect the sleeve and seals.
If equipped with an automatic lubrication system, check that the system is functioning correctly and that the lines are not clogged.
The grease should meet requirements for high temperature, high pressure, wear resistance, and corrosion resistance. Some manufacturers recommend using grease containing MoS₂ (molybdenum disulfide) or a high-temperature stable lithium-based grease.
2.2 Routine Inspections
Daily inspection: Check the chisel, bushing, connecting rod, seals, connecting plate, bolts, hoses, and fittings for cracks, looseness, leaks, or foreign objects.
Inspect connections, hose fittings, and fasteners every 8-10 hours.
Inspect the wear of the chisel and bushing, seal condition, and clearance of the connecting rod every 50-100 hours or monthly. If equipment conditions permit, an internal overhaul and maintenance (including seal replacement, inspection of piston, pressure chamber, and nitrogen chamber structure, etc.) is recommended annually or every 600 hours.
2.3 Hydraulic Fluid Management
Ensure the hydraulic oil used in the hydraulic breaker is clean, free from excessive moisture, particulate contamination, or air bubbles.
Strictly adhere to the excavator and hydraulic breaker manufacturers' requirements for oil temperature, pressure, and flow rate. Excessive temperature and overloading will accelerate oil degradation and seal aging.
2.4 Storage and Protection
When not in use for extended periods, slightly lower the breaker tool tip and maintain it in a near-vertical position to reduce stress on the seals and prevent oil leakage.
Apply rust-preventive oil to the tool tip and cover the opening with a protective cap to prevent water, dust, and foreign objects from entering.
Store in a dry environment, avoiding prolonged exposure to sunlight, moisture, and extreme temperature fluctuations.
3. Common Failures and Prevention
|
Fault phenomenon |
Possible causes |
Prevention/treatment recommendations |
|
Impact force decreased, cracking power weak |
Insufficient oil pressure, oil contamination, nitrogen cavity leakage, seal aging, severe bushing wear |
Check oil circuit, oil temperature, oil change, seal maintenance, bushing replacement, and nitrogen chamber reorganization |
|
The tool bar (chisel) is stuck, does not rotate, or is stuck |
Insufficient lubrication, impurities entering, eccentric wear or deformation of the rod and bushing |
Increase lubrication frequency, clean tool ends, and replace severely worn parts in a timely manner |
|
Oil or liquid leakage |
Damaged seals, loose threaded joints, and aging and cracked oil pipes |
Regularly replace seals, tighten joints, and use high-pressure oil-resistant hoses |
|
Increased abnormal noise and vibration |
Internal looseness, loose bushings, fatigue cracks in connecting rod components |
Stop the machine to check the connection structure, bushing clearance, and bolt torque |
|
Automatic lubrication failure |
Lubrication system is blocked, grease supply pipe is damaged, or lubrication pump is faulty |
Regularly check the lubrication system, clean the pipelines, and replace damaged parts in a timely manner |
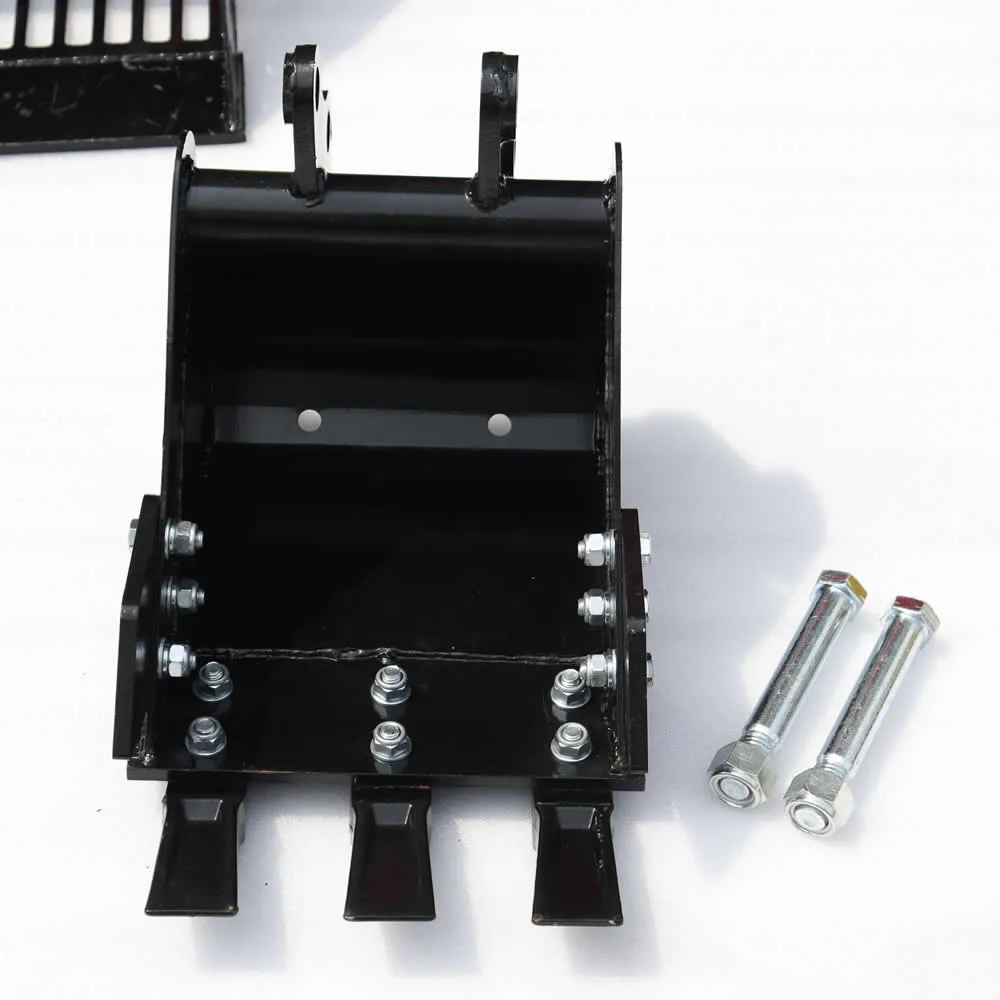
The bucket is the most common and widely used excavator attachment; its wear directly affects excavation efficiency and cost control.
1. Precautions for Use
1.1 Do not overload
Do not use the bucket to forcibly crush hard materials, strike rocks, or use it as a lever. If encountering hard objects, use a hydraulic breaker or rock drill instead.
The load should not exceed the maximum capacity of the excavator/bucket design; otherwise, overloading, damage to the swing mechanism, or damage to the track system may occur.
1.2 Smooth Operation
During bucket operation, avoid sudden stops, jerks, or forceful movements to minimize impact between the bucket and the ground/soil.
Maintain appropriate digging angle and depth control; avoid forcing the bucket against hard objects.
1.3 Proper Cutting Strategy
For clay and soft soil, use a straight digging motion; for gravel and crushed stone, use a sloped or scraping motion to reduce side edge wear.
When working in tunnels or trenches, avoid the bucket edge directly scraping against sidewalls or obstacles. 1.4 Avoid Dry Grinding and Idling
When the bucket does not make good contact with the material, or only picks up air or a small amount of soil, adjust the angle and reposition the bucket immediately; do not continue to operate it idly.
If the bottom of the bucket contacts rocks or hard structures, operate with caution to prevent damage to the cutting edges and wear plates.
1.5 Pay Attention to Impacts and Collisions
During movement, transportation, and switching, avoid collisions with structural components, the ground, or nearby objects, especially the bucket shell, side plates, and support frame.
During flat ground operation, also pay attention to friction and impact between the bottom of the bucket and the road surface (especially concrete, stone slabs, etc.).
2. Maintenance Tips
2.1 Daily Cleaning and Inspection
At the end of each shift or day, clean the inside and outside of the bucket with a water hose, high-pressure sprayer, or wire brush to remove accumulated dirt, sand, and debris, allowing for timely observation of cracks, wear, and loose nuts or pins.
Pay special attention to the bucket tip, side plates, bottom plate, corners, and support structure for cracks, deformation, and signs of fatigue.
2.2 Management of Bucket Teeth, Side Cutters, and Wear Plates
Bucket teeth are consumable parts and should be inspected regularly for wear and replaced promptly. Severe wear or missing teeth can cause uneven stress and rapid damage to the bottom plate and shell.
For reversible bucket teeth and reversible cutting edges, it is recommended to flip or replace them when they are worn to a certain extent.
Side cutters and adapters should be replaced or reinforced as needed based on wear. Failure of the side cutter can easily lead to wear or damage to the bucket sidewall.
2.3 Pin, Bushing, and Hinge Maintenance
Maintain good lubrication at pin, bushing, and hinge connections. Grease or lubricate daily according to the manufacturer's specifications. This reduces friction and wear.
Regularly check the clearance between the pin and bushing. If there is lateral play, abnormal noise, binding, or jamming, replace the damaged parts immediately.
Bolts and fasteners can loosen due to vibration; regularly check the torque and lock or replace them as necessary. 2.4 Structural Reinforcement and Welding Repair
Cracks and fatigue cracks should be repaired and reinforced promptly to prevent further propagation. Additional weld beads or reinforcing plates can be added to areas subjected to high stress.
After repair or welding, stress relief or heat treatment (depending on material and thickness) should be performed to reduce residual stress and prevent deformation or recurrence of cracks.
2.5 Corrosion Protection and Coating Maintenance
The bucket surface is exposed to the elements and prone to moisture, oxidation, and corrosion. Regular application of rust-preventive paint, grease, or corrosion inhibitor is recommended.
Repair any scratches, dents, or damaged coating promptly to prevent rust from spreading.
2.6 Storage and Maintenance
When not in use for extended periods, store the bucket on a level, well-drained surface to avoid uneven pressure or damage.
Protect the inner surfaces and critical edges with a protective cover or apply rust-preventive oil.
3. Common Faults and Prevention
|
Fault phenomenon |
Possible causes |
Prevention/treatment recommendations |
|
The shovel teeth are broken or fall off |
Poor tooth material quality, loose installation, overload use |
Choose high-quality accessories, tighten according to torque, follow usage specifications, and replace in time |
|
Cracks in bucket bottom plate and side plate |
Overload, collision, fatigue crack expansion not promptly welded |
Control loads, avoid hard impacts, check for cracks regularly and repair them |
|
Hinge is loose and creeping |
Bushing wear and pin degradation |
Regularly check and replace bushings, lubricate, and control fitting clearances |
|
Severe surface corrosion |
Protective coating damage, moisture erosion |
Regular painting, rust prevention, and timely repair of damaged areas |
|
Structural deformation and distortion |
Long-term eccentric load, high temperature, residual stress |
Stress relief after welding, avoid long-term uneven load, reinforced design |
The hydraulic boom (including the main boom, swing boom, linkage, and hydraulic cylinder) supports heavy loads and transmits power, serving as the core connection of the entire machine; proper maintenance is crucial.
1. Operating Precautions
1.1 Avoid Side Loading and Misalignment
During operation, avoid subjecting the excavator to torsional stress, such as side tilting or angled digging. Prioritize using the boom and dipper to adjust the position, rather than forcibly twisting the boom.
Avoid creating a lever effect between the boom and the work surface, which could cause structural distortion or overloading.
1.2 Control Speed and Coordinate Movements
All movements should be smooth; avoid sudden jerks or pulls. Especially during heavy-duty operations such as rotation, boom extension/retraction, and dipper tilt, anticipate load changes and slow down to reduce impact.
During breaks or when not in operation, retract the boom and minimize its extended length to reduce the load on the structure.
1.3 Avoid Structural Interference and Collisions
When changing tasks or positions, plan the movement path in advance to prevent collisions between the hydraulic boom, bucket, linkage, and other structural components.
In confined spaces or areas with obstacles, exercise extra caution to avoid contact between the front or intermediate structures and objects.
1.4 Use Proper Support for Lifting and Transporting
When additional support or material handling is needed, use the bucket, grabber, or other tools; do not rely on the boom structure for "support" or "lifting" heavy objects.
Avoid causing a sudden, significant increase in load on the hydraulic boom or exceeding the design limits.
2. Maintenance Tips
2.1 Regularly Lubricate Hinged Joints
Grease or lubricate hinge pins, bushings, bearings, and pin holes according to the manufacturer's recommended schedule to reduce friction and wear.
The lubricant must meet high-load, high-pressure, and anti-oxidation performance requirements. 2.2 Inspection of Structural Cracks and Fatigue Damage
Regularly conduct non-destructive testing (visual inspection, dye penetrant testing, or other NDT methods) on areas such as the main boom, auxiliary boom, connecting rods, support plates, and welds, focusing on identifying any abnormalities such as cracks, deformation, and signs of fatigue.
Pay particular attention to the initiation of cracks at the supports, weld joints at stress concentration points, reinforcing ribs, and connecting rod interfaces.
2.3 Pin and Bush Replacement and Fit Control
Replace pins and bushings promptly if excessive clearance, abnormal noise, play, or severe wear is detected.
When installing new parts, ensure proper fit (interference or sliding fit), attention to surface finish, and proper lubrication.
2.4 Hydraulic Cylinder Maintenance
Keep the hydraulic cylinder piston rod clean to prevent sand and particles from damaging the seals.
Inspect the piston rod for scratches, rust, and oil film discontinuities; repair or replace seals as needed.
Regularly inspect the cylinder port connections, threaded connections, seals, and buffer structures.
Prevent bending loads on the cylinder barrel to avoid abnormal wear on the seals.
2.5 Coating and Corrosion Protection
For steel structural components such as the hydraulic boom, connecting rods, and supports that are exposed to the elements, apply rust-proof and weather-resistant paint and maintain it regularly.
Install wear-resistant plates on areas with severe wear or high risk.
2.6 Inspection of Piping and Hose Installation and Fastening
Ensure that oil pipes, hoses, quick-connect fittings, and supports on the hydraulic boom are properly arranged and secured to prevent crushing, abrasion, twisting, and stretching.
Pipe clamps and supports must be securely fastened and vibration-resistant.
Replace or inspect hoses promptly if they are aged, cracked, or have loose fittings.
Regularly tighten and inspect pipe connections and fittings for leaks.
3. Common Faults and Prevention
|
Fault phenomenon |
Possible causes |
Prevention/treatment recommendations |
|
Arm cracks and fatigue fractures |
Structural fatigue, improper operation, excessive load |
Regular inspection, reasonable operation, reinforced design, and control of impact loads |
|
The hinge is loose and swings |
Bushing wear, pin size deviation, and fit failure |
Regularly check the fit clearance, replace accessories, lubricate, and control torque |
|
Oil cylinder leakage and creeping |
Damaged seal ring, damaged rod face, loose joints |
Regularly maintain seals, inspect rod faces, and tighten joints |
|
Hose burst, leak |
Aging, breakage, extrusion, wear and tear |
Choose high-quality hoses, replace them regularly, lay them out properly, and add sheaths |
|
Coating peeling and rust |
Improper maintenance of protective layer, long-term exposure or corrosive environment |
Regularly touch up the paint, add anti-corrosion layer, and ensure the integrity of the coating |
To maintain the optimal condition of various excavator attachments (hydraulic breaker, bucket, hydraulic arm), reduce downtime due to malfunctions, and extend their service life, the following comprehensive recommendations and management procedures are provided:
1. Establish Attachment Records and Maintenance Logs
Create a record sheet for each attachment, including serial number, specifications, purchase date, operating hours, and repair/replacement history.
Regularly summarize and track their service life, failure trends, and spare parts replacement history for evaluation, budgeting, and procurement purposes.
2. Develop a Regular Inspection and Maintenance Schedule
Schedule routine inspections and maintenance based on operating hours or calendar periods (e.g., 10h, 50h, 100h, 500h, annual inspection, etc.).
Clearly define inspection items, responsible personnel, operation records, and acceptance standards.
3. Train Operators
Train operators on attachment usage standards, safety procedures, fault identification, and daily maintenance practices.
Operators should be able to "see, feel, and detect problems early": inspect before operation, observe during operation, and recheck after operation.
4. Reasonably Plan Work Sequence and Tool Switching
During the construction plan design stage, consider the sequence of different attachment switching and working conditions (e.g., excavation – crushing – removal) to minimize improper use.
Avoid frequent disassembly and assembly, and avoid using unsuitable attachments for the specific work conditions.
5. Maintain a Spare Parts Inventory
Keep a stock of commonly used spare parts (such as bucket teeth, bushings, pins, seals, grease, quick-change fittings, etc.) for quick replacement when malfunctions occur.
The spare parts inventory should be linked to the record system, replenished in time, and outdated items should be discarded.
6. Environmental and Storage Management
Store attachments in a dry, level, and sheltered location when not in use.
Take protective measures against moisture, corrosion, and vibration, such as covering, protective casing, or rust-proof coating.
Regularly inspect stored attachments and address any abnormalities promptly.
7. Collaborate with the Manufacturer/Service Provider for Repairs
For advanced repairs (such as internal component replacement of a hydraulic breaker, crack detection of the hydraulic arm, or welding repairs of structural components), contact the original manufacturer or a professional repair service.
After repairs, conduct thorough testing, commissioning, and record-keeping to ensure the attachment returns to a reliable operating condition.
Excavator attachments, such as hydraulic breakers, buckets, and hydraulic arms, are essential components for maintaining the performance, functionality, and lifespan of the excavator, even though they are technically considered "external" components. Proper usage, rigorous daily inspections, timely lubrication and maintenance, and a sound repair and replacement strategy can effectively reduce downtime, lower maintenance costs, and improve project quality and safety.
In practical applications, maintenance intervals, lubrication strategies, and protective measures should be adjusted based on the specific excavator model, working conditions, and environmental factors (such as dusty, cold, humid, or saline environments).
This article aims to provide valuable reference information for excavator operators, maintenance personnel, and equipment managers. If you have any questions about specific attachments or are interested in purchasing or customizing excavator attachments, please contact us.

